Image compression reduces file size by removing or simplifying image data. Used well, it can make a page feel faster while keeping images visually sharp enough for readers. This matters for publishers, bloggers, and site owners improving performance because small publishing decisions compound across a site over time.
The Core Idea
The core idea is simple: good compression finds the smallest file that still looks right in the actual page context. When this idea is applied consistently, the page feels more intentional and the publishing process becomes less dependent on memory or guesswork.
Why It Matters in Practice
A hero image may need higher quality than a tiny related-post thumbnail. Compressing both with the same settings can either waste file size or damage the important visual.
This is where local tools are useful. They give you a fast way to check one detail without opening a large application or sending your content through an external service. For a focused hands-on check, use the Image Compressor and Image Resizer while reviewing the page.
A Practical Step-by-Step Workflow
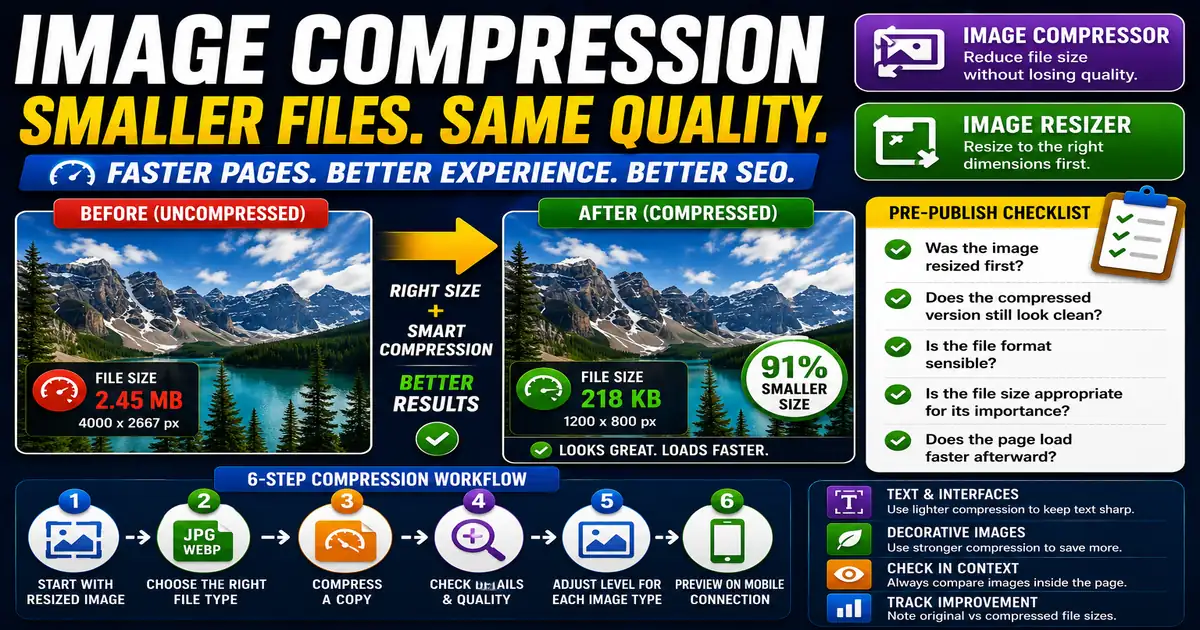
Compression should be tested visually because numbers alone do not tell the whole story.
- Start with a correctly resized image.
- Choose an appropriate file type.
- Compress a copy and compare quality.
- Check text, faces, charts, and product details closely.
- Use stronger compression for decorative images.
- Preview the final page on a phone connection when possible.
This workflow can be added to a publishing checklist, a content brief, or a personal editing routine. The exact order may change from one project to another, but the habit of checking before publishing is what protects quality over time.
Practical Example
A screenshot with interface text should stay crisp enough to read. A decorative background can usually tolerate more compression because it carries less instructional detail.
Common Mistakes to Avoid
When optimizing this element in your drafts, review the final output carefully to avoid errors that compromise readability and search presentation. Watch for these specific mistakes:
- Compressing before resizing.
- Over-compressing screenshots with text.
- Ignoring image format.
- Using huge transparent PNGs for photos.
- Saving multiple copies without tracking which one is final.
Pre-Publish Checklist
Review this focused checklist before publishing your work to ensure all details are correct:
- Compress PNGs and JPEGs to reduce size below 100KB.
- Use WebP format to achieve better compression ratios.
- Review image quality after applying lossy compression.
- Remove camera metadata (EXIF data) to save extra bytes.
A Small Workflow Tip
Compare compressed images inside the page, not only in a file viewer. A compression level that looks fine alone may look soft next to sharp text or interface screenshots. The final question is whether the reader can understand the image at the size it appears on the page. Context is the best quality test.
For image-heavy blogs, keep a simple note of the original file size and the compressed file size. This makes performance improvements visible and helps editors understand why the extra step belongs in the workflow.