In modern web publishing, page speed is a confirmed ranking factor and a critical component of user experience. If your site takes longer than three seconds to load, a significant percentage of visitors will leave before seeing your content. The single most common cause of slow website loading times is unoptimized, oversized image files.
Why Large Images Hurt Your Site
When a visitor opens a page on your blog, their browser has to download every element, including stylesheets, scripts, text, and images. While a text page is only a few kilobytes, a single uncompressed smartphone photo can exceed 5 megabytes (5,000 KB). Downloading multiple large files consumes bandwidth, increases host response times, and results in a laggy user experience, especially on mobile networks.
The Difference Between Resizing and Compressing
To optimize images, you must perform two distinct steps:
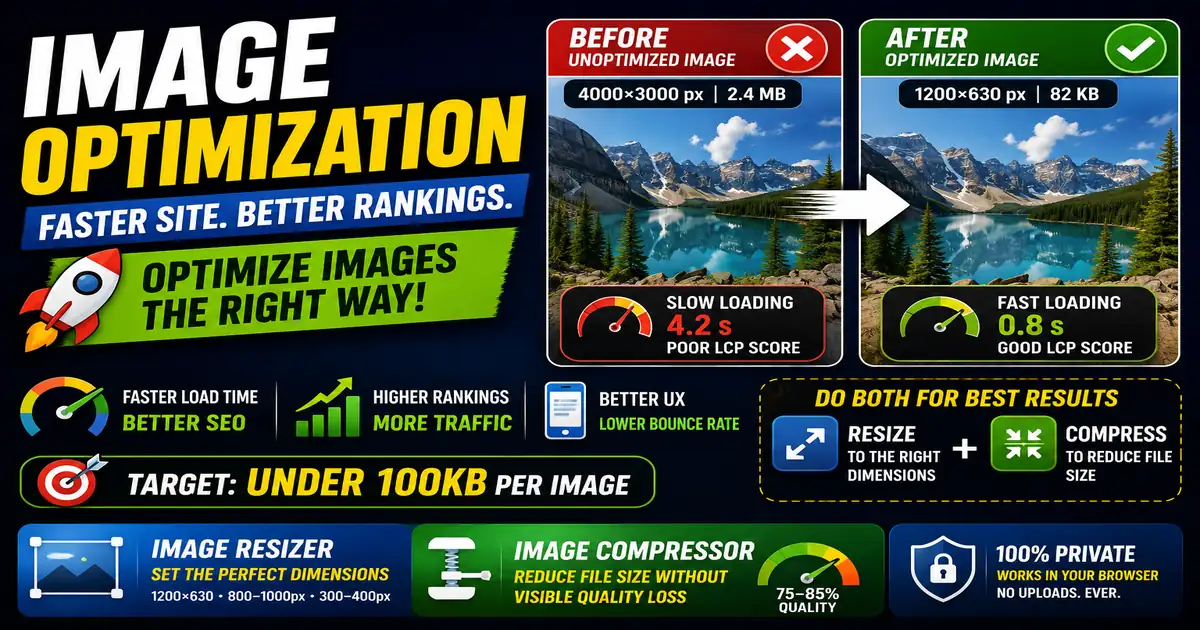
- Resizing (Dimensions): This changes the pixel width and height of an image. If your blog display area is only 800 pixels wide, there is no benefit to uploading a photo that is 4,000 pixels wide. The browser will have to scale it down anyway, wasting valuable download size.
- Compressing (File Size): This reduces the file data size by removing unnecessary metadata or slightly lowering color details. Quality compression can reduce image file sizes by 70% or more without any visible loss of quality.
Simple Web Image Best Practices
- Keep files under 100KB: Aim to keep blog images, icons, and diagrams below 100 kilobytes whenever possible.
- Use modern formats: Next-generation image formats like WebP provide superior compression compared to legacy PNG or JPEG formats.
- Add alt text: Always write descriptive alternative text for search engines and screen readers.
To crop and scale your site graphics instantly, use our local Image Resizer, and compress them for production using the Image Compressor.